I’ll never forget the day I learned how to ride a two-wheeler. When I looked over my shoulder – just for a second until I felt my handlebars start to wobble – and saw the look of pride on my dad’s face, I knew it was the beginning of a new chapter for me. In my town, kids went everywhere on their bikes all summer long and moms and dads let them. Many of us had that kind of childhood, where most days you were out of the house soon after breakfast and didn’t come home until dinner.
When my first child approached bike-riding age, of course, times had changed. Add to that the size of the market we live in and it’s easy to understand why lots of kids don’t learn how to ride bikes until much later. The fact is, most of us drive our kids everywhere they need to go. I don’t know of a single family whose kids ride their bikes to school.
So for my kids, learning how to ride solo became more of a confidence builder than a need for a mode of transportation. After the youngest of our kids cruised through that highly anticipated pre-K bike day as one of only a few two-wheelers in the class – her face beaming with pride – I knew we had a system that worked.
Step 1: Introduce your toddler to a traditional trike-like ride-on.
Scooters and wagons and walkers and push-cars are all great, but it’s the pedals and handlebars that get them ready for real bike riding. I recommend a Big Wheel or other fun and relatively inexpensive trike-styled ride-on, rather than a traditional tricycle.
Step 2: Invest in a well-built sidewalk bike with training wheels.
The frame height on these are typically between 5” and 9” and for us, this size was a great substitute for a regular tricycle. Depending on your child’s height, the sidewalk bike might feel just as small as a tricycle anyway. The point is to keep it low to the ground so your child feels safe at all times. And since you already have a Big Wheel, you won’t need to buy a real tricycle now.
Step 3: Find some open road.
Not everyone has a paved driveway or lives in a cul-de-sac, but there are empty parking lots, basketball courts, public parks, or long stretches of sidewalk in most parts of Richmond. Your child has to practice and master riding the sidewalk bike with training wheels before he’ll feel comfortable taking them off. By the time one of my kids was done with her training wheels, we had adjusted them so high that they were hardly touching the ground anyway. It’s very important for kids to feel some wind in their faces during this stage.
Step 4: Teach your child smart riding skills from the beginning.
First, kids (just like adults) should always wear helmets when riding bikes. Make sure your two-wheeler-in-training has a helmet he likes and knows how to wear it properly. Second, discourage your child from sitting on the bike seat with his feet on the pedals while the bike is stationary. When the bike comes to a stop, have him hop down to a standing position while holding the handlebars, even though the training wheels are keeping him and the bike upright. This way, when the training wheels are gone, he won’t be inclined to keep his feet on the pedals and ultimately fall over.
Step 5: Set your child up for success and get it done.
After you’ve given your child plenty of opportunities to practice on his well-built, perfectly fitting sidewalk bike with training wheels, and he’s tooling around with confidence, set the date together. Then say, “We’re agreed! Next Tuesday, we’ll take your training wheels off and you’ll be a two-wheeler in no time.” If you’re sure your child is ready and he’s excited about the challenge, try to set aside an afternoon or a few hours on a Saturday and get it done.
Step 6: Coasting comes first.
The training wheels are off and the big day has arrived. A few days in advance of this date, find a yard or grassy field with a pretty good incline. This is where your child will master the skill of coasting. Start at the top of the incline with his bottom on the seat and both feet on the ground. Have him start walk-riding down the hill. Next, have your child let both legs hang to the ground and coast down the hill. Try again with both legs sticking out from the bike and coast some more. No pedaling is necessary. This step helps kids get used to the concept of staying upright without training wheels.
Step 7: Now, teach him how to ride a two-wheeler.
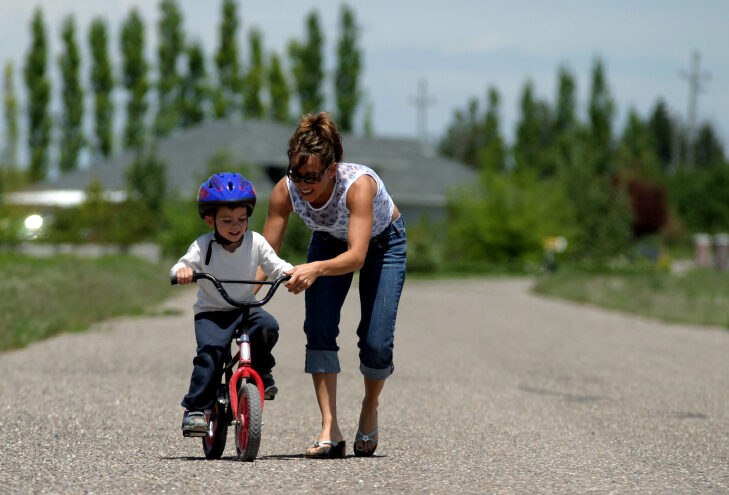
The final step might leave you winded, but it’s well worth it. Find a large, empty parking lot where your child will feel completely safe, and you’ll feel comfortable knowing he can’t take a wrong turn. Before you begin, remind him a few times that all he has to do is put his feet down if he’s worried about falling. Now the fun part! This is where you trot next to the bike holding the seat firmly to help balance your child. You may need to do this again and again before you sense that he’s ready to go it alone.
If he’s been practicing the way he should have been, you won’t be able to keep up with him for long before you have to let go. When he does take off, encourage him to keep going straight for a while. Getting accustomed to steering takes some time and more practice. If he starts to fall, remind him to put his feet down, and take it from the top.
Step 8: Celebrate the world’s newest two-wheeler!
As a finishing touch, have a little gift ready for your two-wheeler to celebrate at home. I tried to keep it simple and bike-related, like a bell or horn, those colorful handlebar streamers, or clip-on spoke charms.
In the end, the biggest gift you’re giving your child is the feeling of confidence and success that comes with being able to ride a bike – something every kid deserves.


