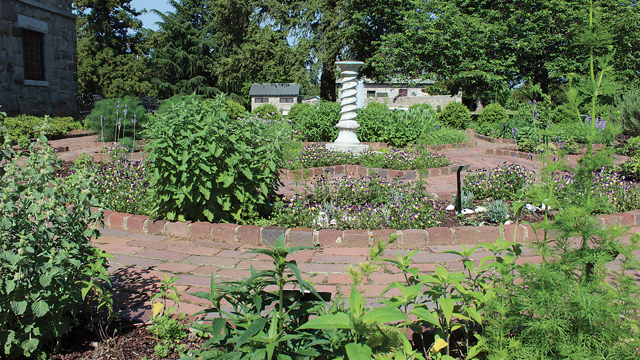
Are the spices in your pantry tasting dull? Why settle for lackluster herbs when you can grow your own and have them fresh at hand when you need them?
It’s not complicated to cultivate your own supply of herbs, just follow a few simple steps, whether you’re growing herbs in your garden or in containers. For best results, start with mature herb plants from a reputable nursery. For inspiration, visit botanical.com or join the volunteers of the Old Dominion Herb Society (check them out on Facebook), who have helped maintain the herb garden at Maymont since 1978.
Step One: Consider your space needs.
Outdoors, a good rule of thumb is to allow two to three square feet per plant, although this might vary based on the herb. Most herbs prefer full sun, so choose a location that receives a good six hours of direct sunlight per day. If a particular plant requires partial shade, select a location with afternoon shade, which gives plants some relief from the warm southern exposure.
Step Two: Check your soil type.
If it is clay, the soil will need to be amended with compost. Also, check the pH of the soil using a pH kit from your local garden center. Most herbs prefer soil pH in the six to seven range, which is somewhat neutral. For container gardening, choose a pot with holes for proper drainage, and add light, well-draining soil with plenty of peat, perlite, and vermiculite.
Step Three: Prepare to plant.
Carefully remove the plant from the pot. If it is hard to get out, do not pull on the stem, which could injure it. Instead, squeeze the sides of the pot, or slide a knife inside the pot to loosen the roots. As a last resort, you may have to cut off the pot. If any roots are coming out of the bottom of the pot, or if it is root-bound (roots spiraling around inside the pot), loosen or cut into the roots, so they will have the room to grow out into the soil, instead of around in circles. Remove any dead, brown, or slimy roots, and any insects you see.
Step Four: Plant.
Dig a hole in the ground as deep as the pot. Carefully plant at the same depth as was originally in the pot. Few plants will survive well with their stems buried, but do put a thin layer of soil over the existing soil mass to keep it from drying out. As you add the soil, gently press the new soil in, then water, adding more soil if necessary, but only if it settles down.
Step Five: Provide regular care and maintenance.
Water the herbs well after transplanting and check soil moisture regularly (even daily at first) for dryness. When planted in the ground, the roots will still dry out almost as quickly as they would in the pot, until the roots have penetrated the surrounding soil. Test with your finger. If dry, water thoroughly, checking again for saturation. As the plant’s roots grow into surrounding soil, less frequent watering will be needed.
• Fertilizer: Herbs do not require much fertilizer, but if a few leaves start to turn yellow, add a balanced slow-release fertilizer. Do not fertilize dry, wilted plants, as the fertilizer will burn their roots. Water it first and make sure it has recovered before fertilizing. Fertilize once a month, as long as leaf color and growth are good.
• Pinching: Some plants, such as basil, should never be allowed to bloom and go to seed. It decreases the flavor of the leaves, as more of the plant’s energy is being directed to reproduction and away from leaf growth. Pinch off the first few nodes, just above where existing leaves come out, to encourage branching and more stem and leaf production.
Step Six: It’s harvest time!
For outdoor plants, it is best to harvest around ten in the morning, after the dew has dried but before the heat and stress of the day sets in. Wash the cut herbs and hang them in a cool, dry, dark place. Some herbs may be frozen, too. There are many options for storage.
Final thoughts:
In early spring, prune back perennials to encourage new, branching growth. Don’t prune too early, (especially lavender) or new tender growth may freeze. Even with herbaceous plants, leave the top on in winter to keep water from running down inside of the stem to the crown, especially hollow-stemmed plants. Beneficial insects overwinter in the hollow stems, so wait until the temperatures are above fifty degrees before cutting the old growth back in the spring.
Many herbs do very well in containers, particularly when the container can accommodate a full-grown plant. A light, well-drained potting soil is best to use for growing herbs. I look for soil that is sterile, meaning it’s free from insects and disease. Remember, as plants grow, their roots displace the soil, and the leaves have a greater demand for water, so you will have to water more frequently, and your herbs may also need more fertilizer. Always follow the directions on the fertilizer label.
Experiment with different plants and locations as you gain confidence in your gardening skills. You may find you’ll never go back to store-bought herbs, except for the most exotic flavors.


